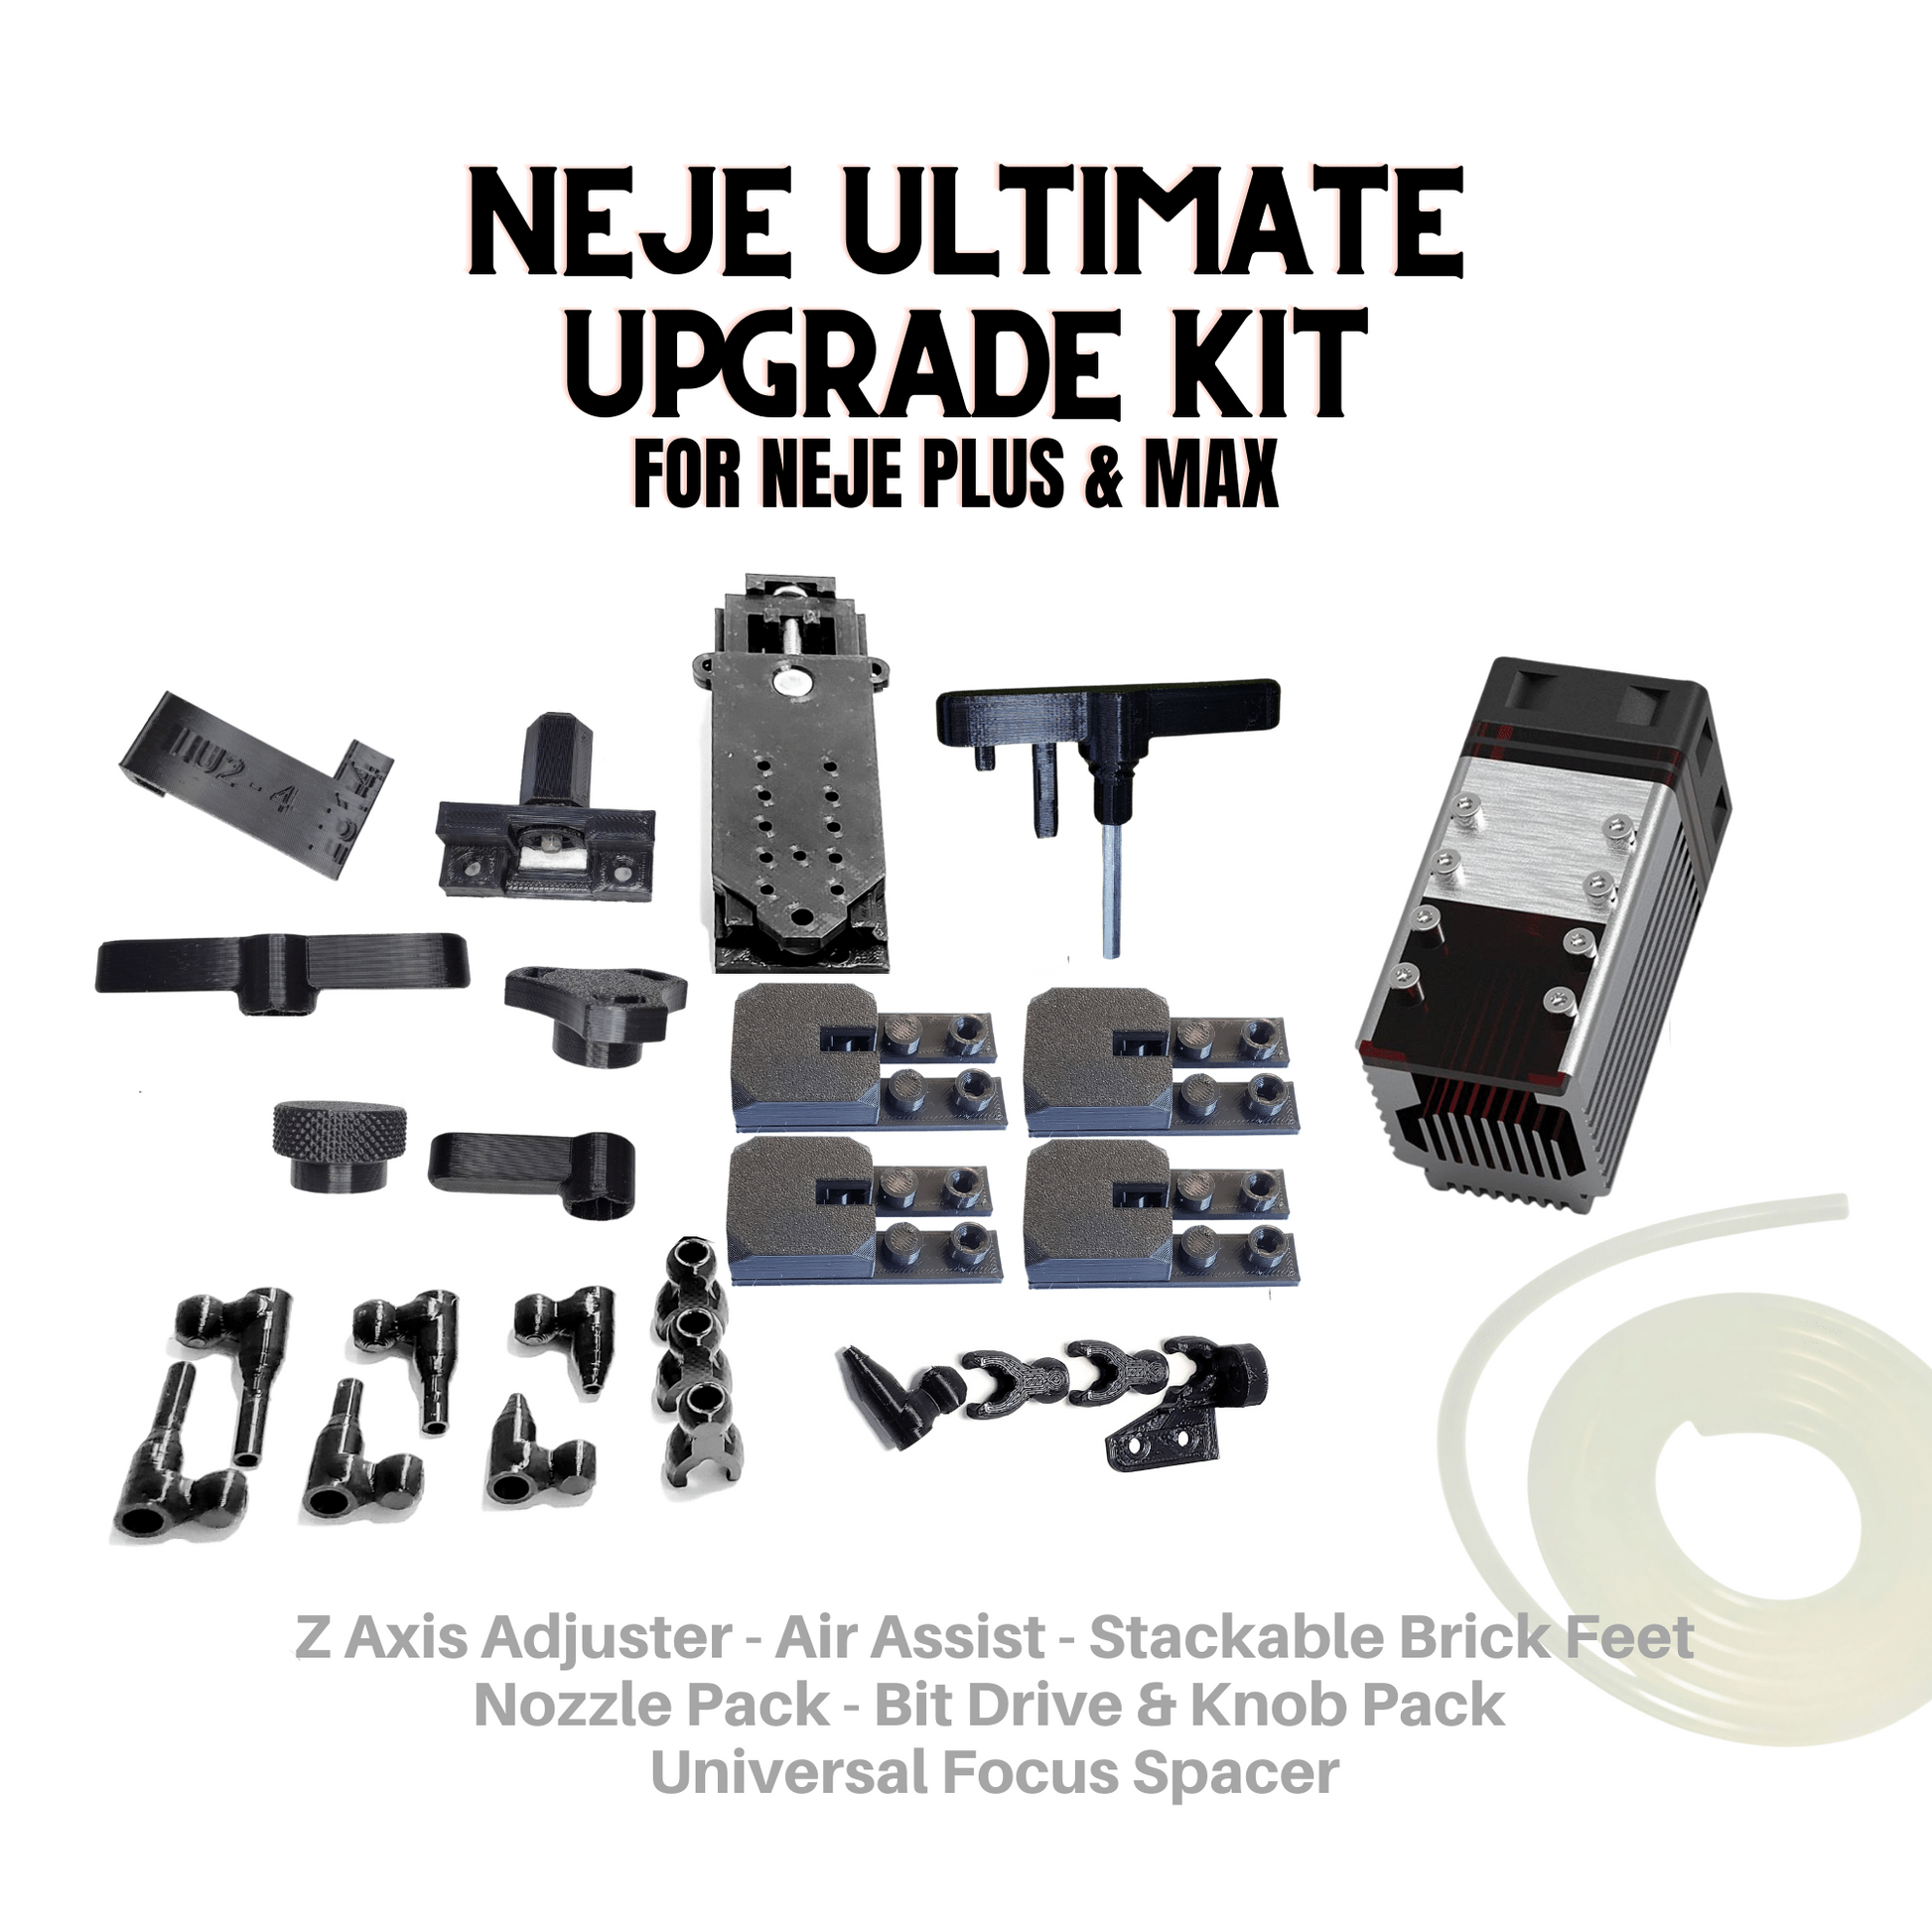
This is the Ultimate Upgrade Kit for your Neje Max or Neje Plus laser engraver. Have you been piecing together all of your upgrades? We put all of our premium upgrades in one package so you can take an already great laser and make it better.
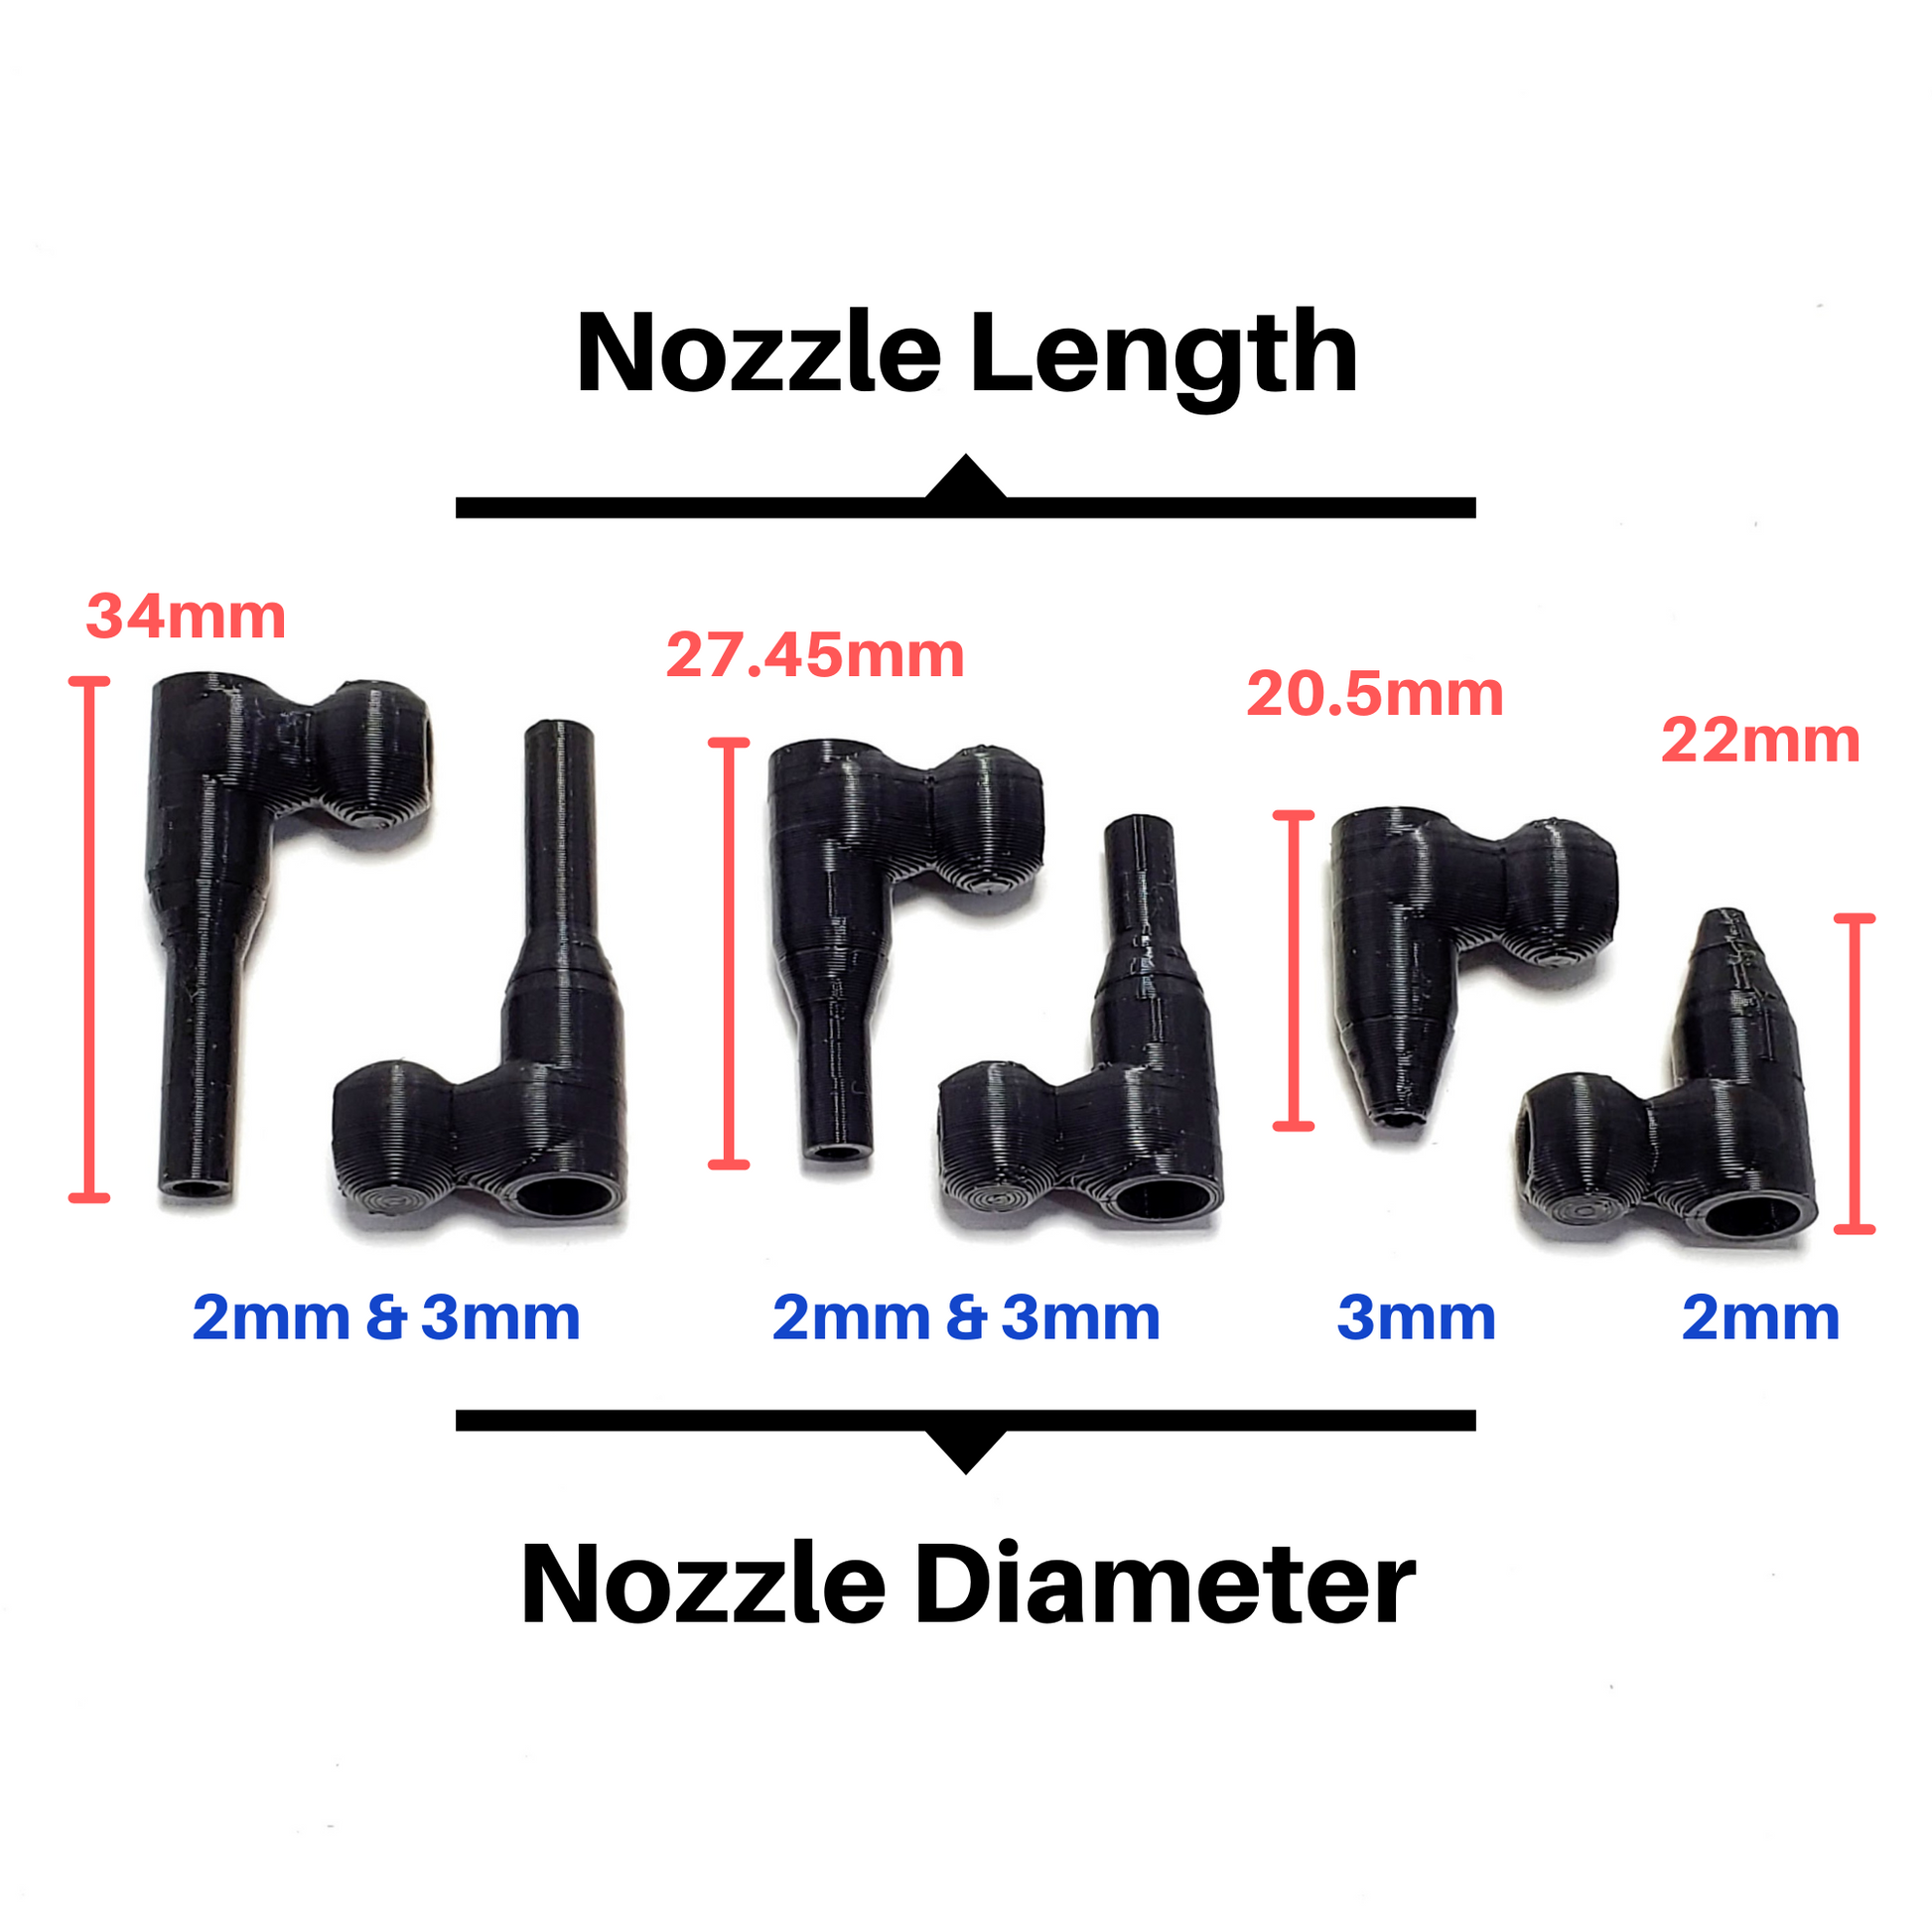
In this kit KGD has included: - Neje Air Assist (with 6 feet of air hose - optional) - Z Axis Adjuster Kit - Stackable Brick Feet that retain and Raise and Lower your laser's frame. - Universal Focus Spacer - T-Handle Wrench (and tool holder for your frame) - 6 pack Nozzle Package (see image for sizing) - Bit Drive & Knob Variety Pack
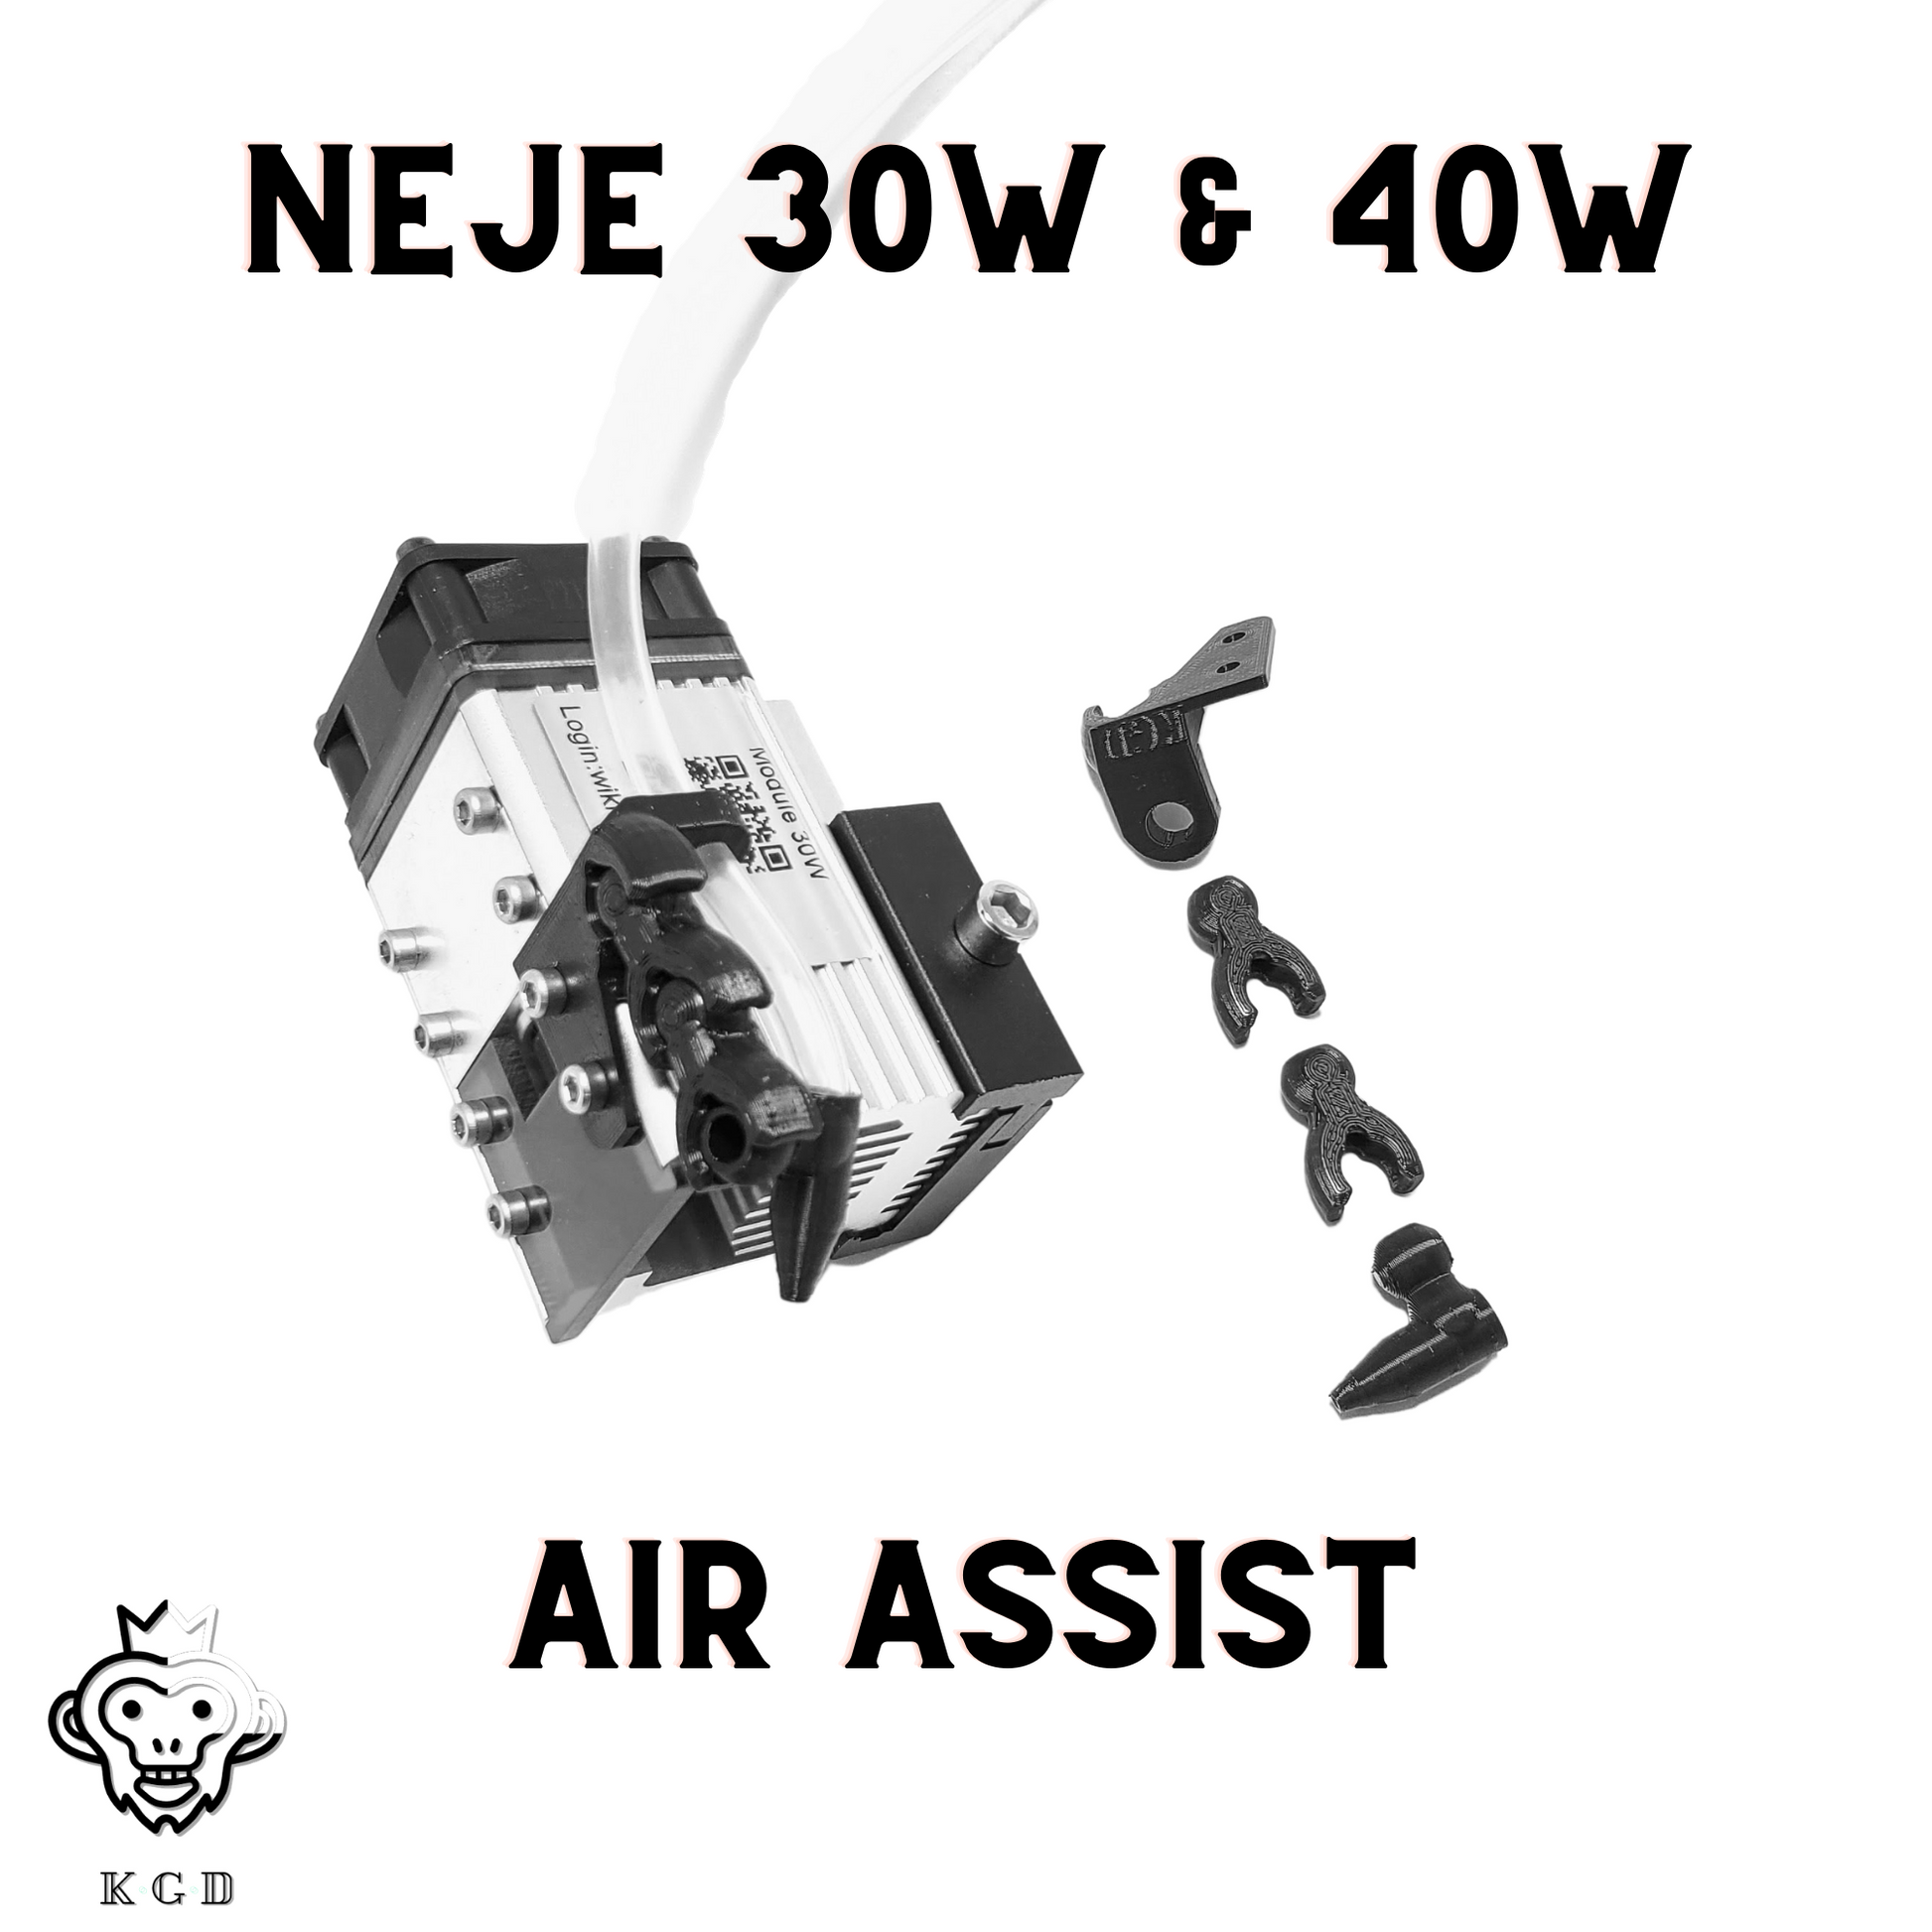
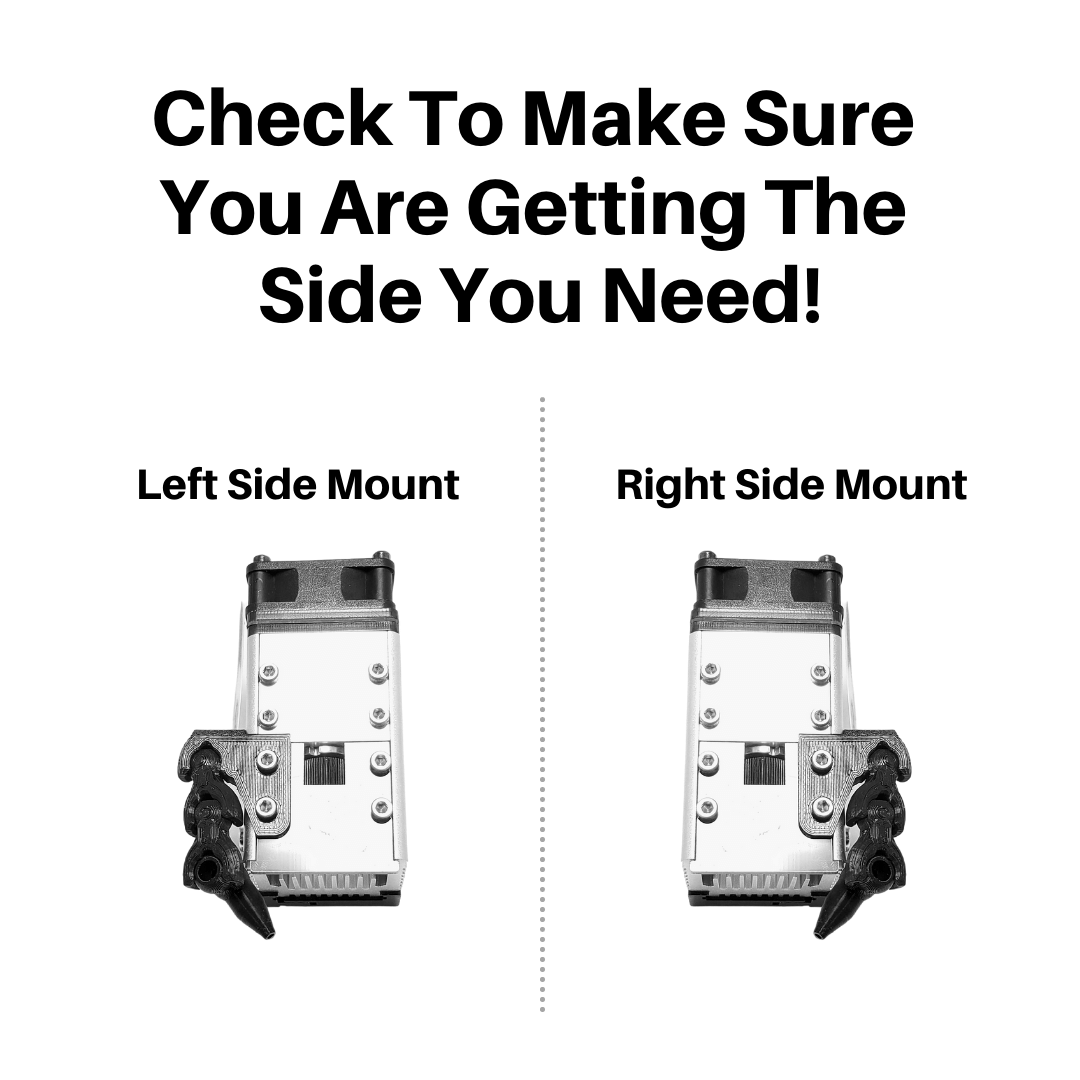
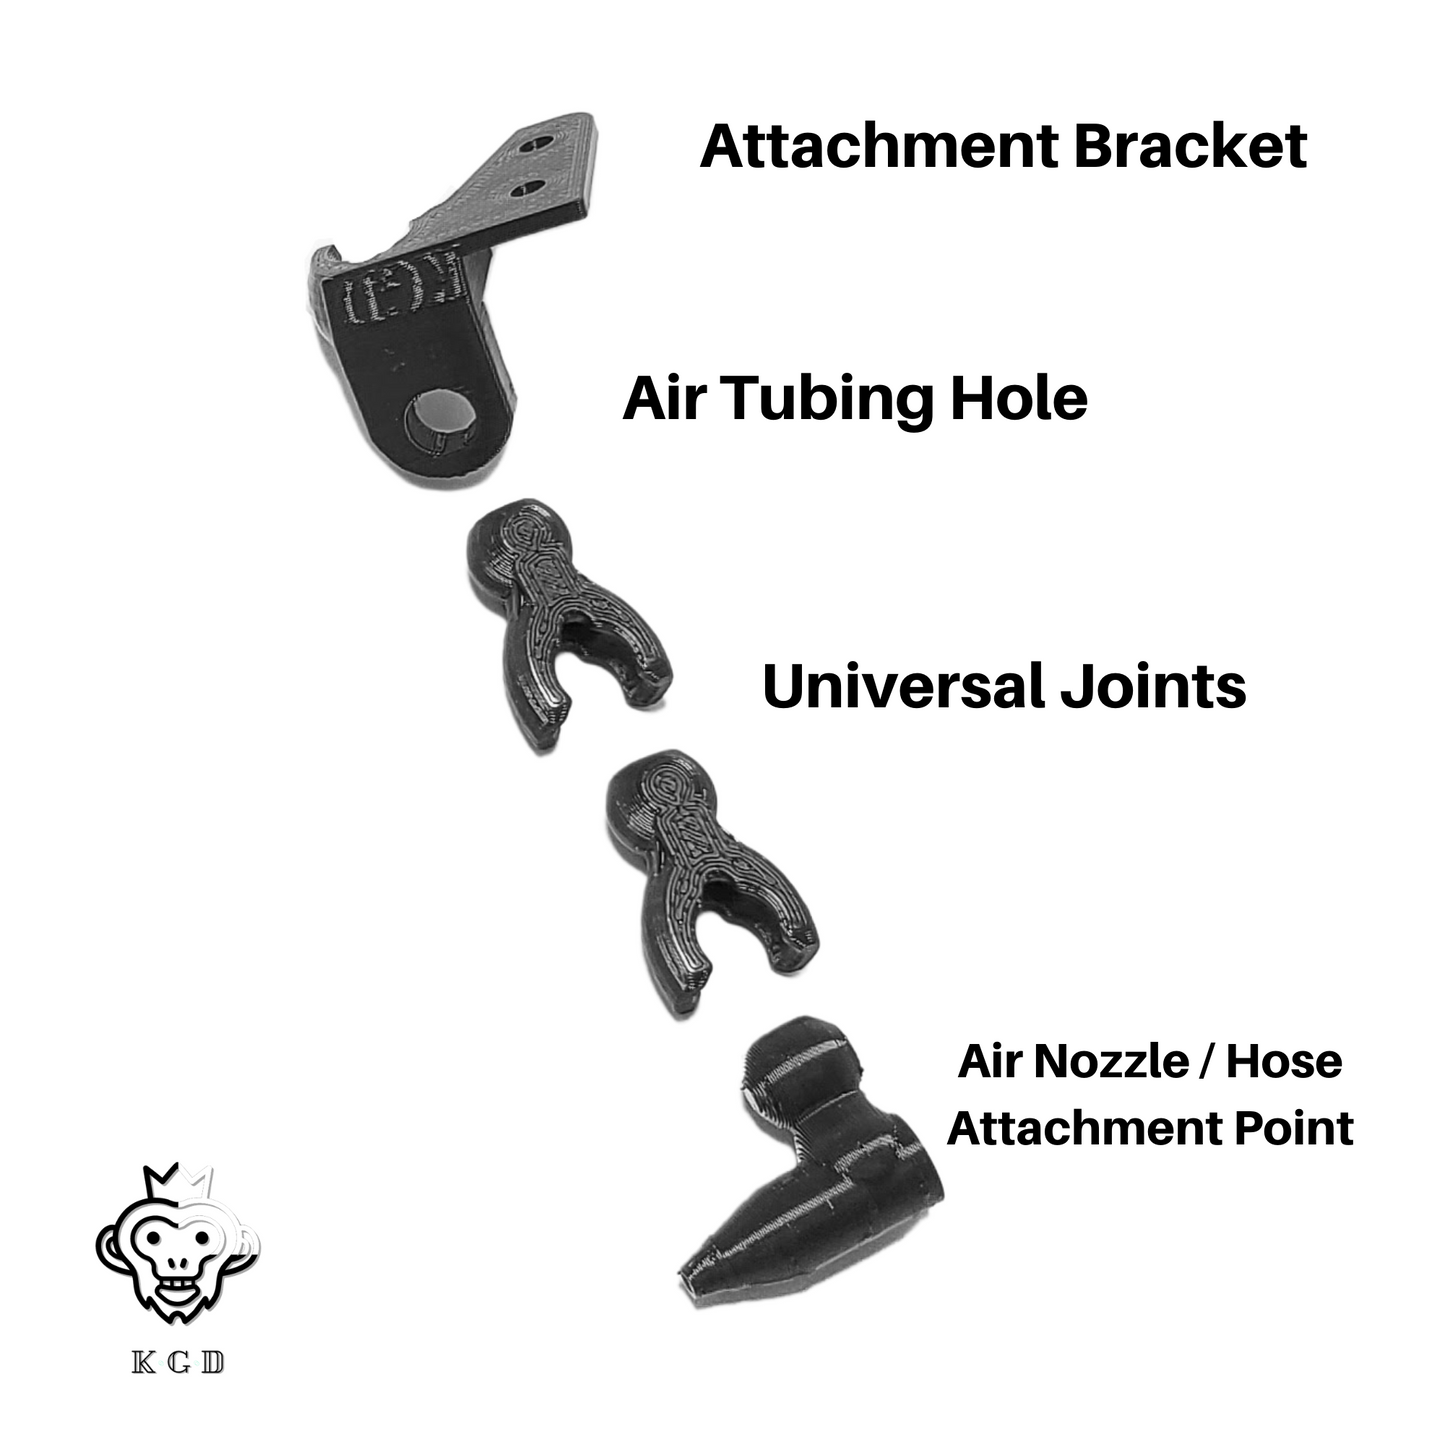
Item Descriptions ------- Neje Air Assist (Left or Right)
Simple and slim. This air assist takes up almost no real estate on your module. It conveniently attaches to the already existing screws on the front of your module.
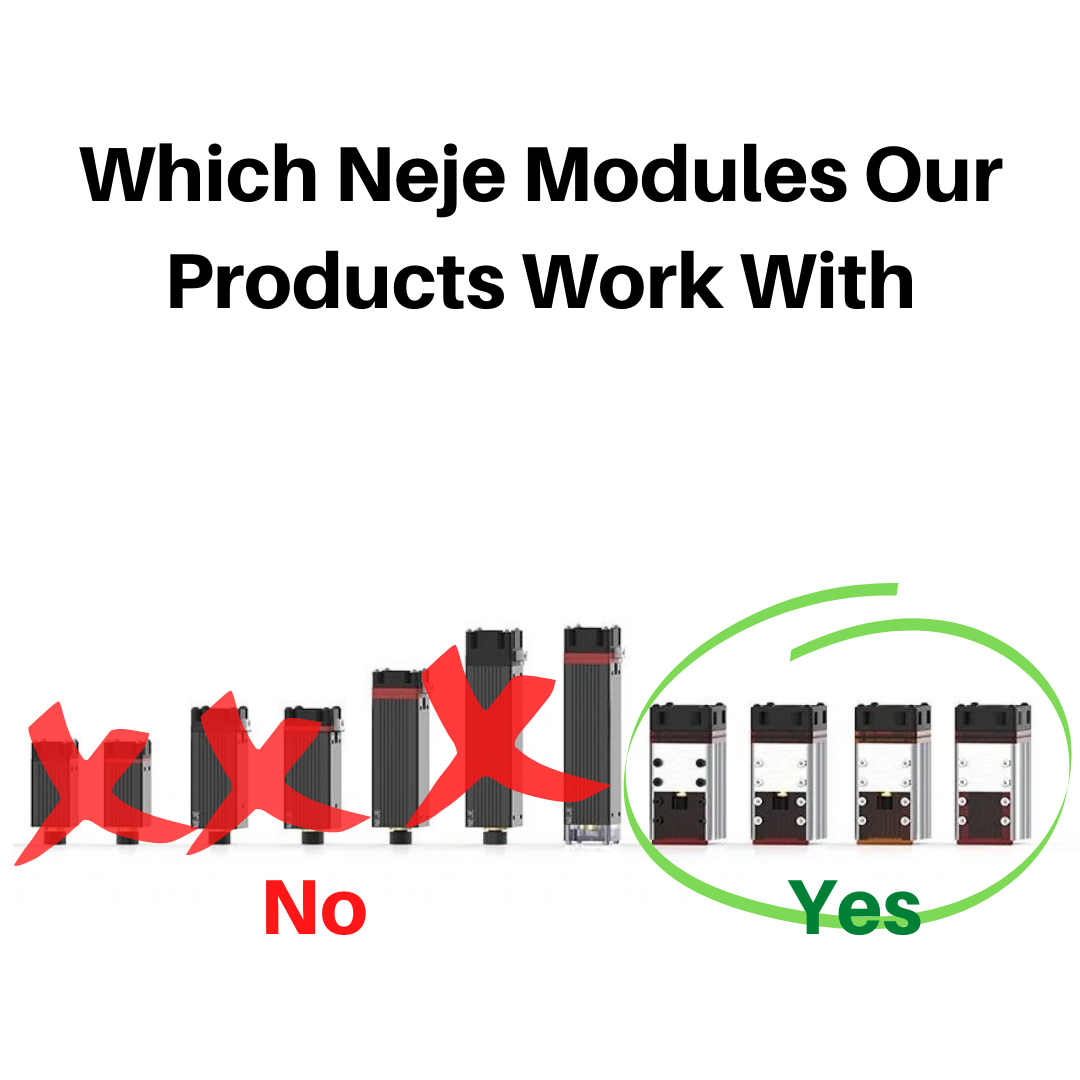
This kit only works with the Neje modules in the picture.
Get deeper cuts by removing the debris with our air assist. Cleaner engravings and overall better performance. If you have shop air, we recommend between 20-25psi. Small pumps will show great improvement as well but not as good as the larger pumps.
Tools Required: 2mm allen wrench
Install: -Fasten the attachment bracket to the module's holes with the stock M3 screws on the front of the module (acrylic shield) -arrange and fasten in all of your adjustable links, hose mount, and air nozzle -Install your 6mm hose (add-on) -Guide hose up to the stepper area -Secure hose with zip ties to the wire loom and connect to air pump -Place Nozzle at 45 Degrees 2-3mm from laser dot on workpiece.
-----
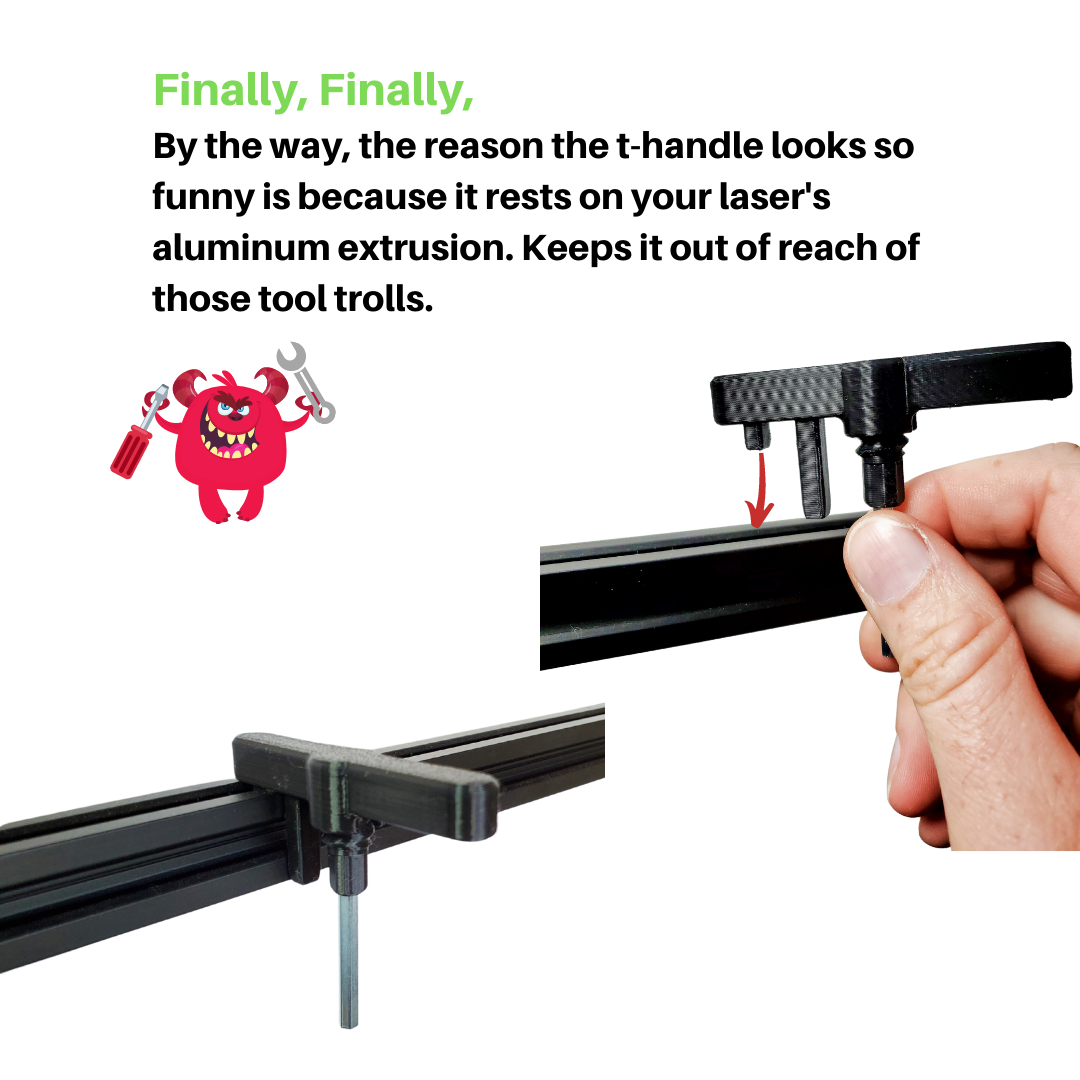
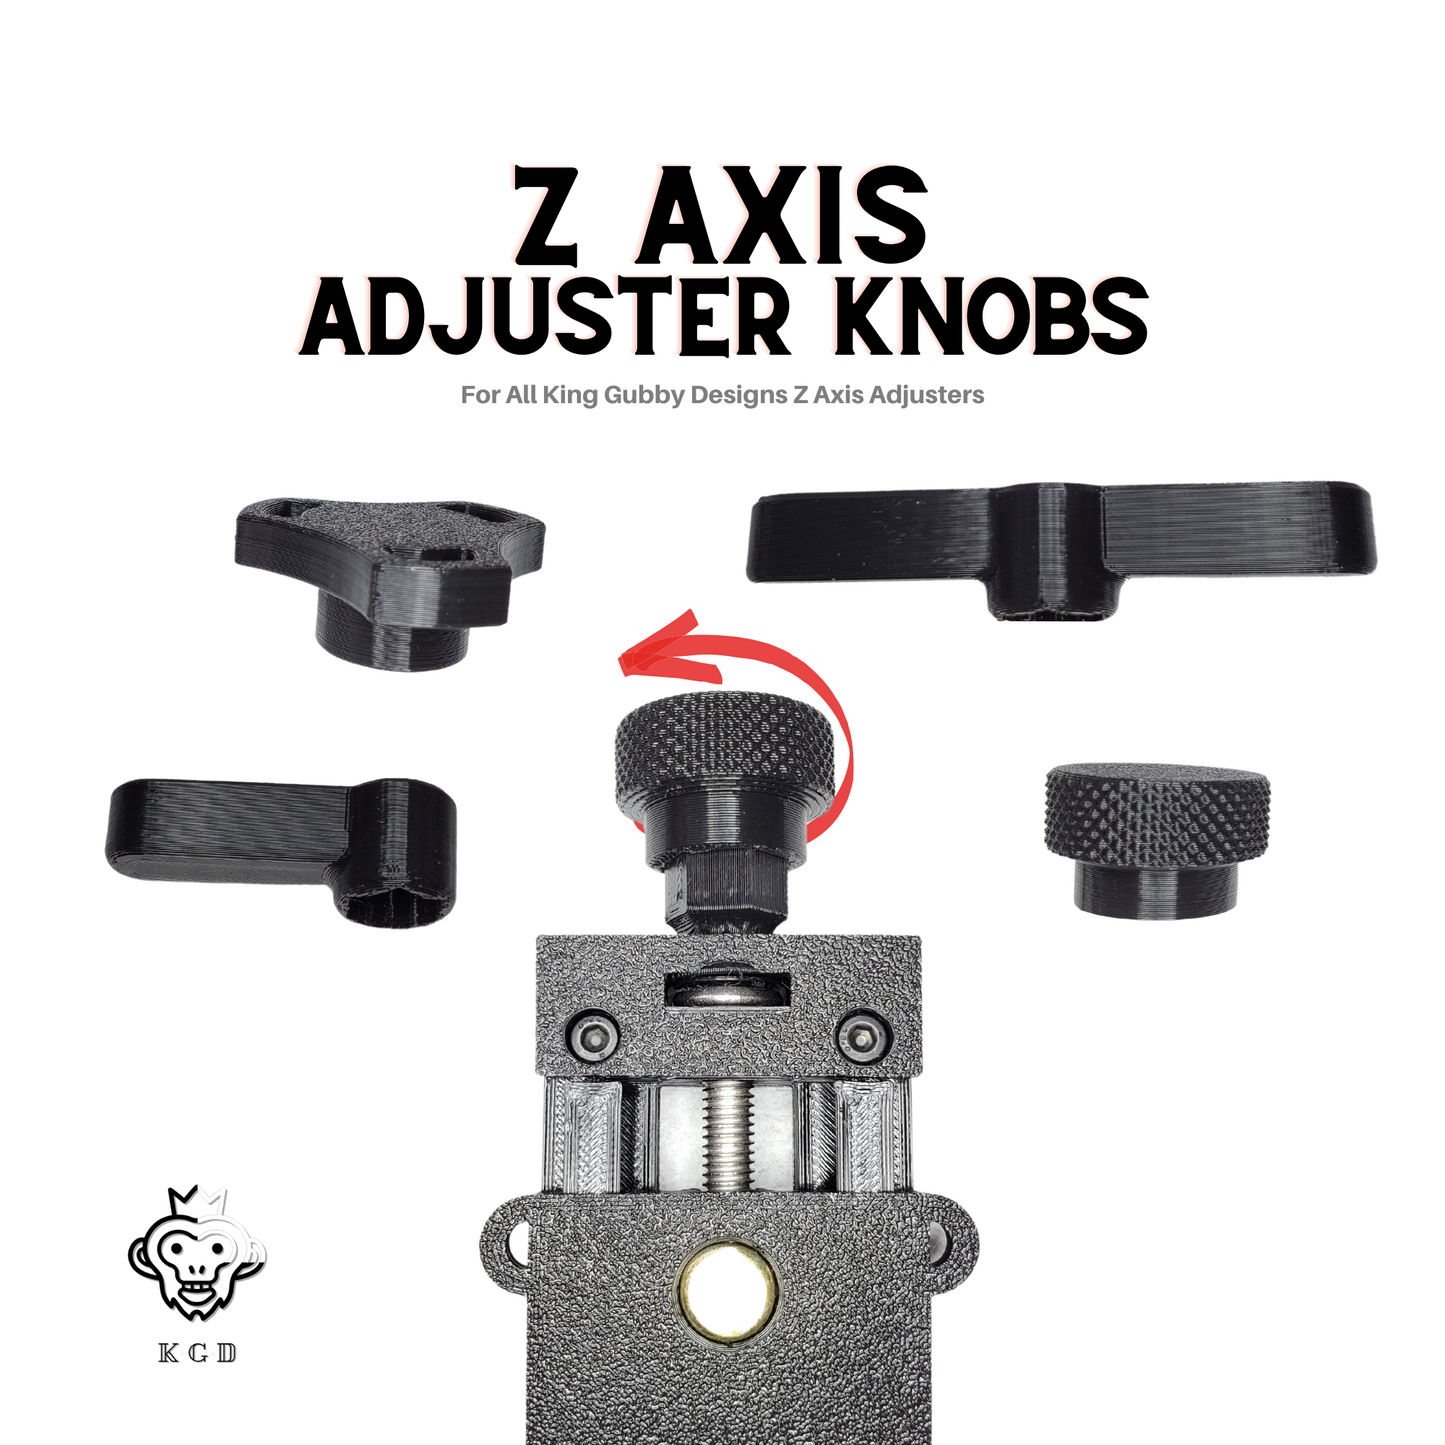
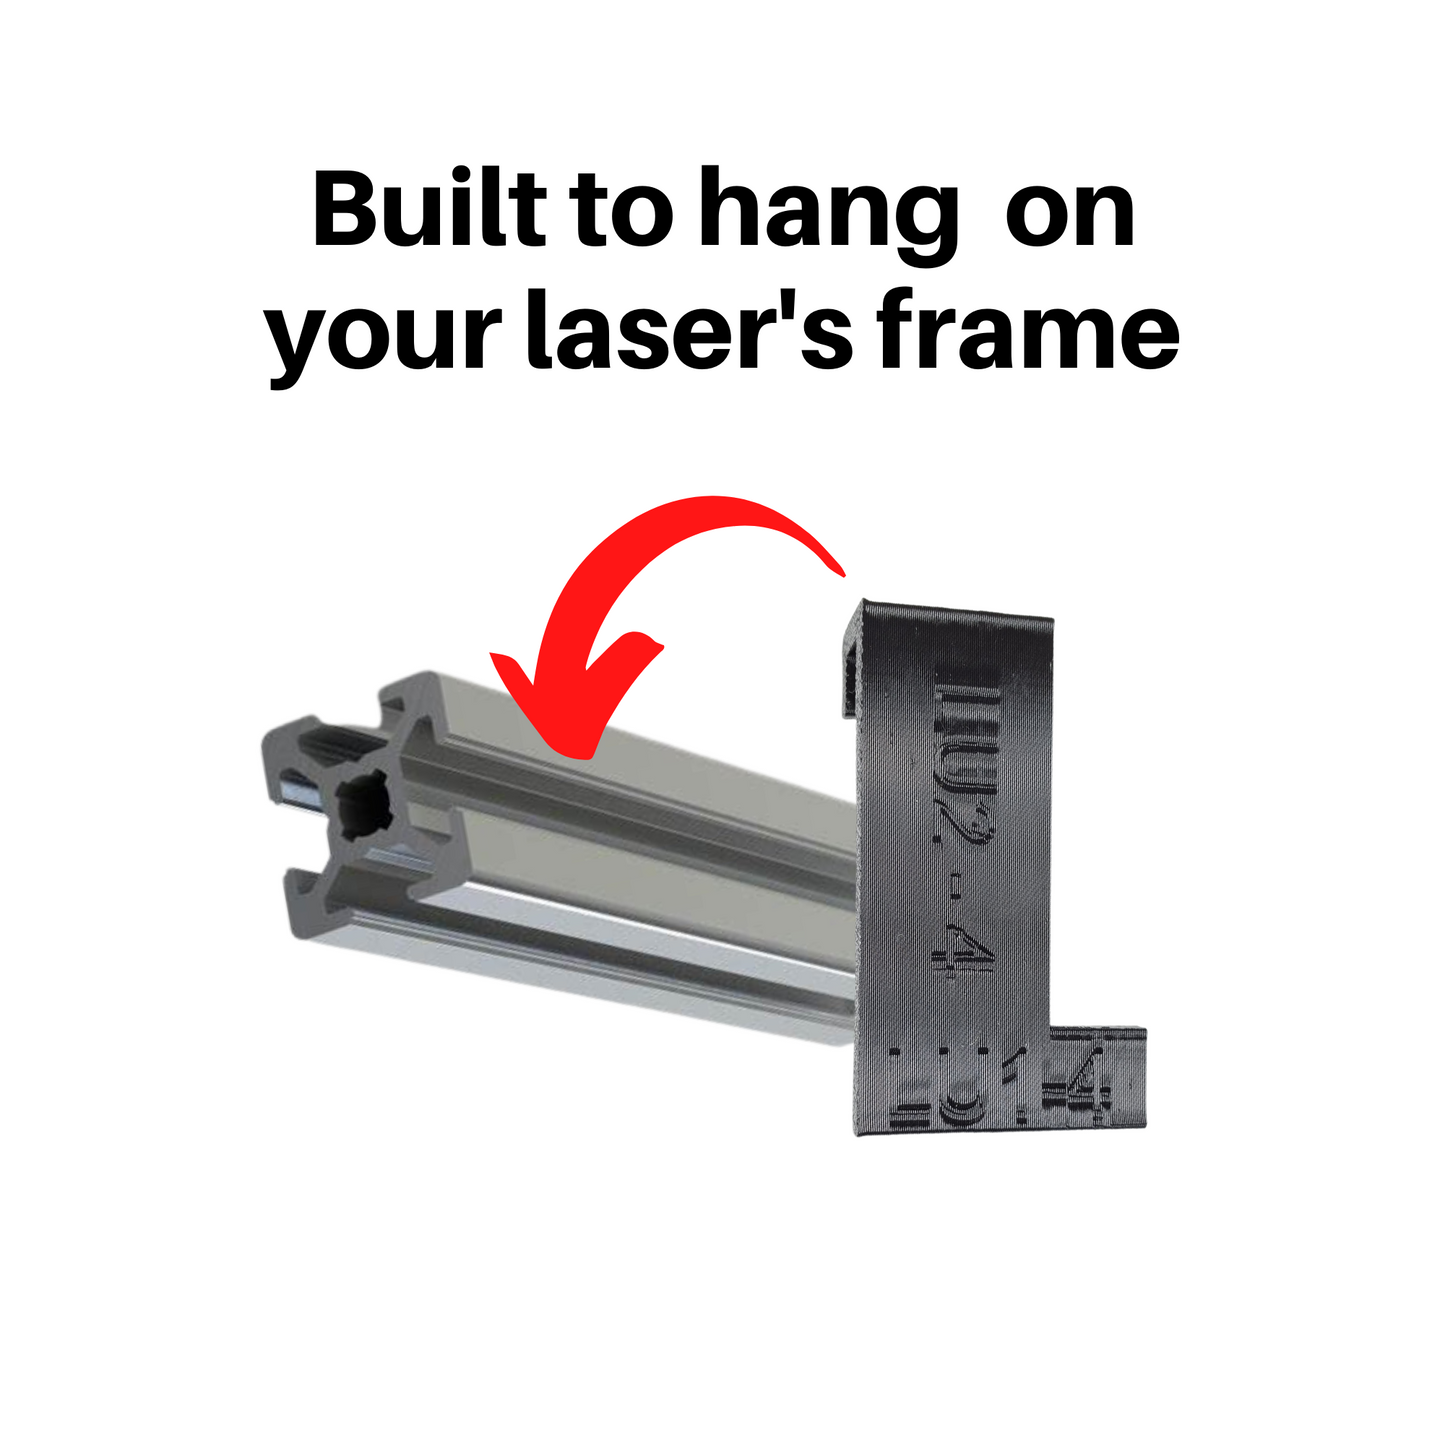
Neje Z Axis Adjuster
Gives you 50mm of Z travel for quick and easy focus
YOU MAY NEED TO ADJUST YOU END-STOP and we recommend moving the end stop before running your laser.
Uses 4mm allen wrench to adjust, includes T-Handle wrench which hangs on your laser's frame.
Install: -Entirely disassemble the z axis adjuster, if it came assembled -Remove the dovetail pieces from both your carriage and module -Replace those pieces with the printed counterparts and slide it together on the machine -Insert barrel nut and drop M5 bolt through hole in the top of the carriage plate -Attach the bolt lock clip over the bolt head
-----
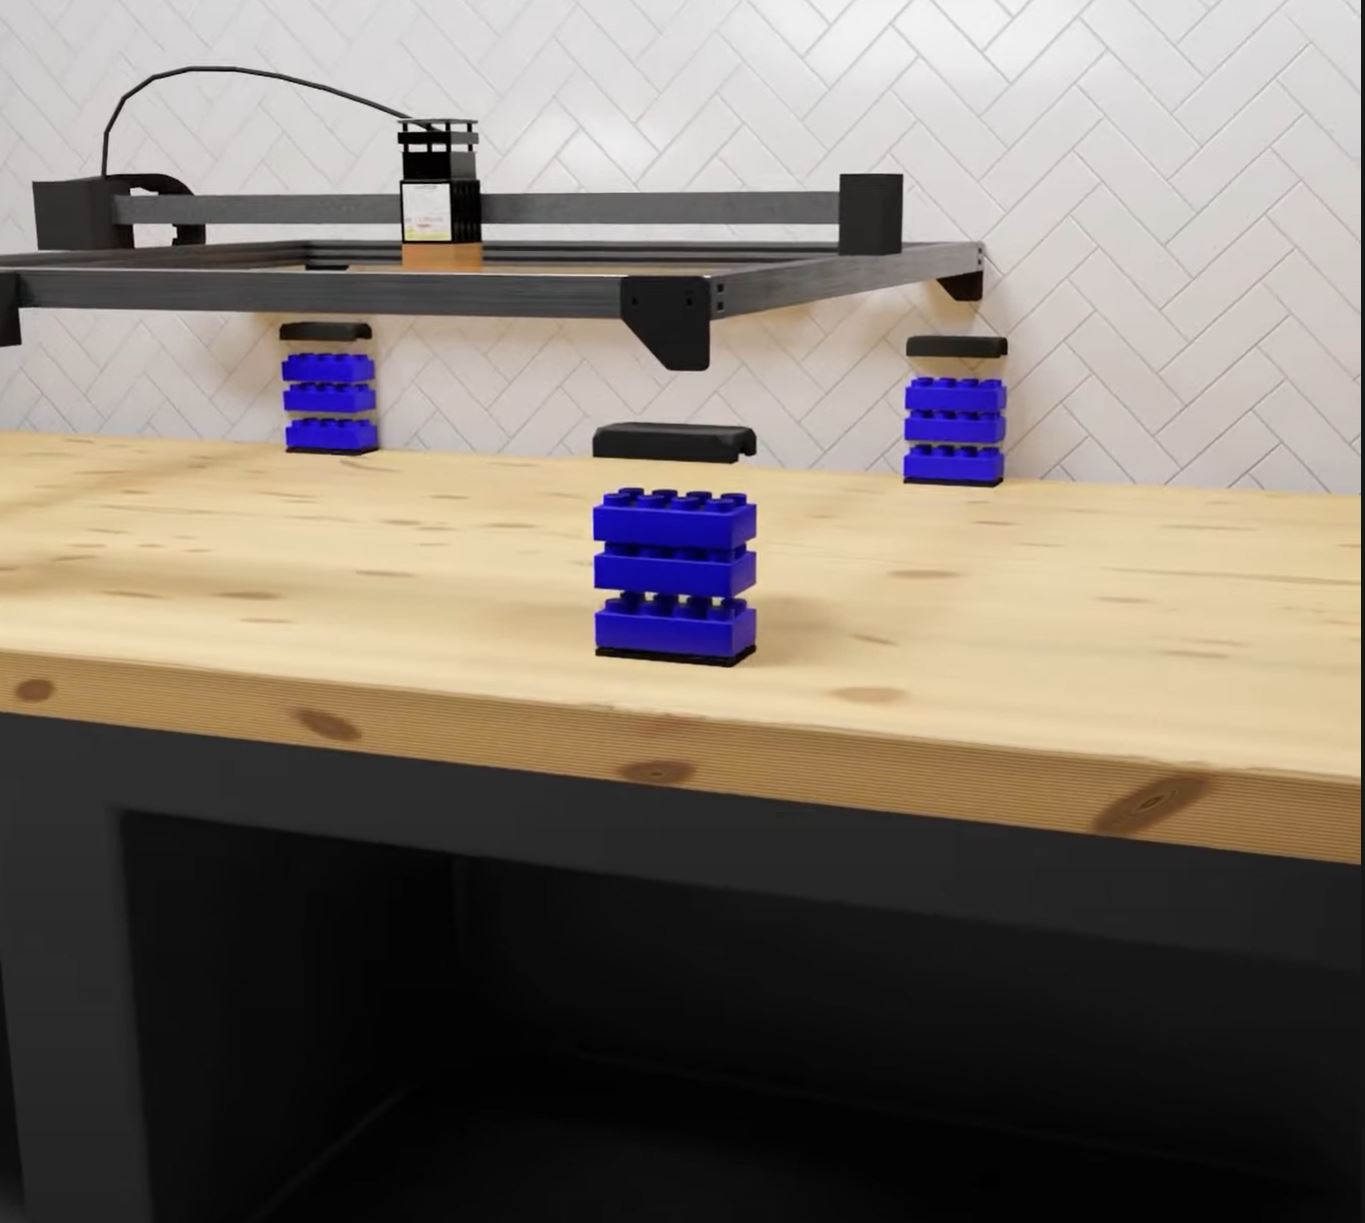
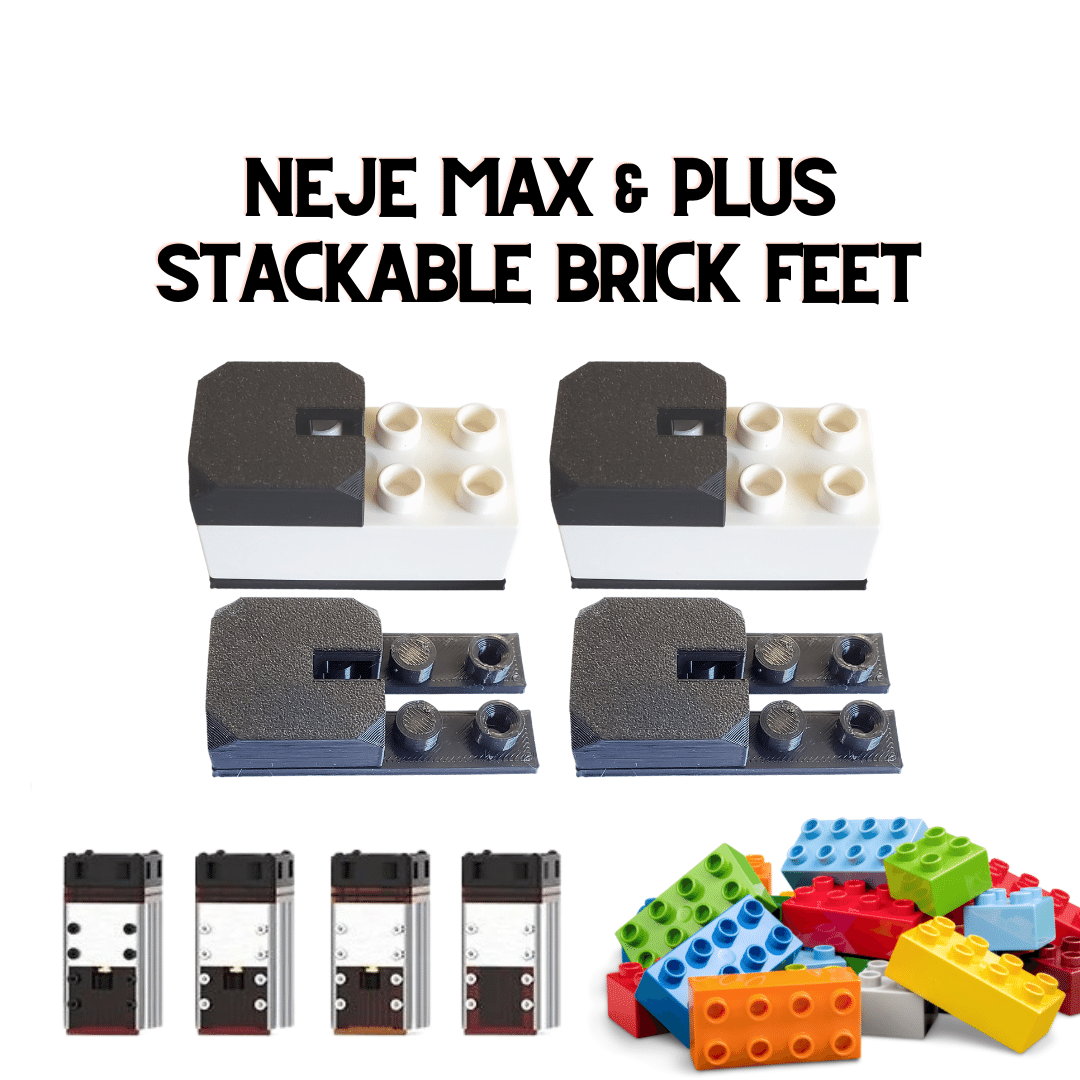
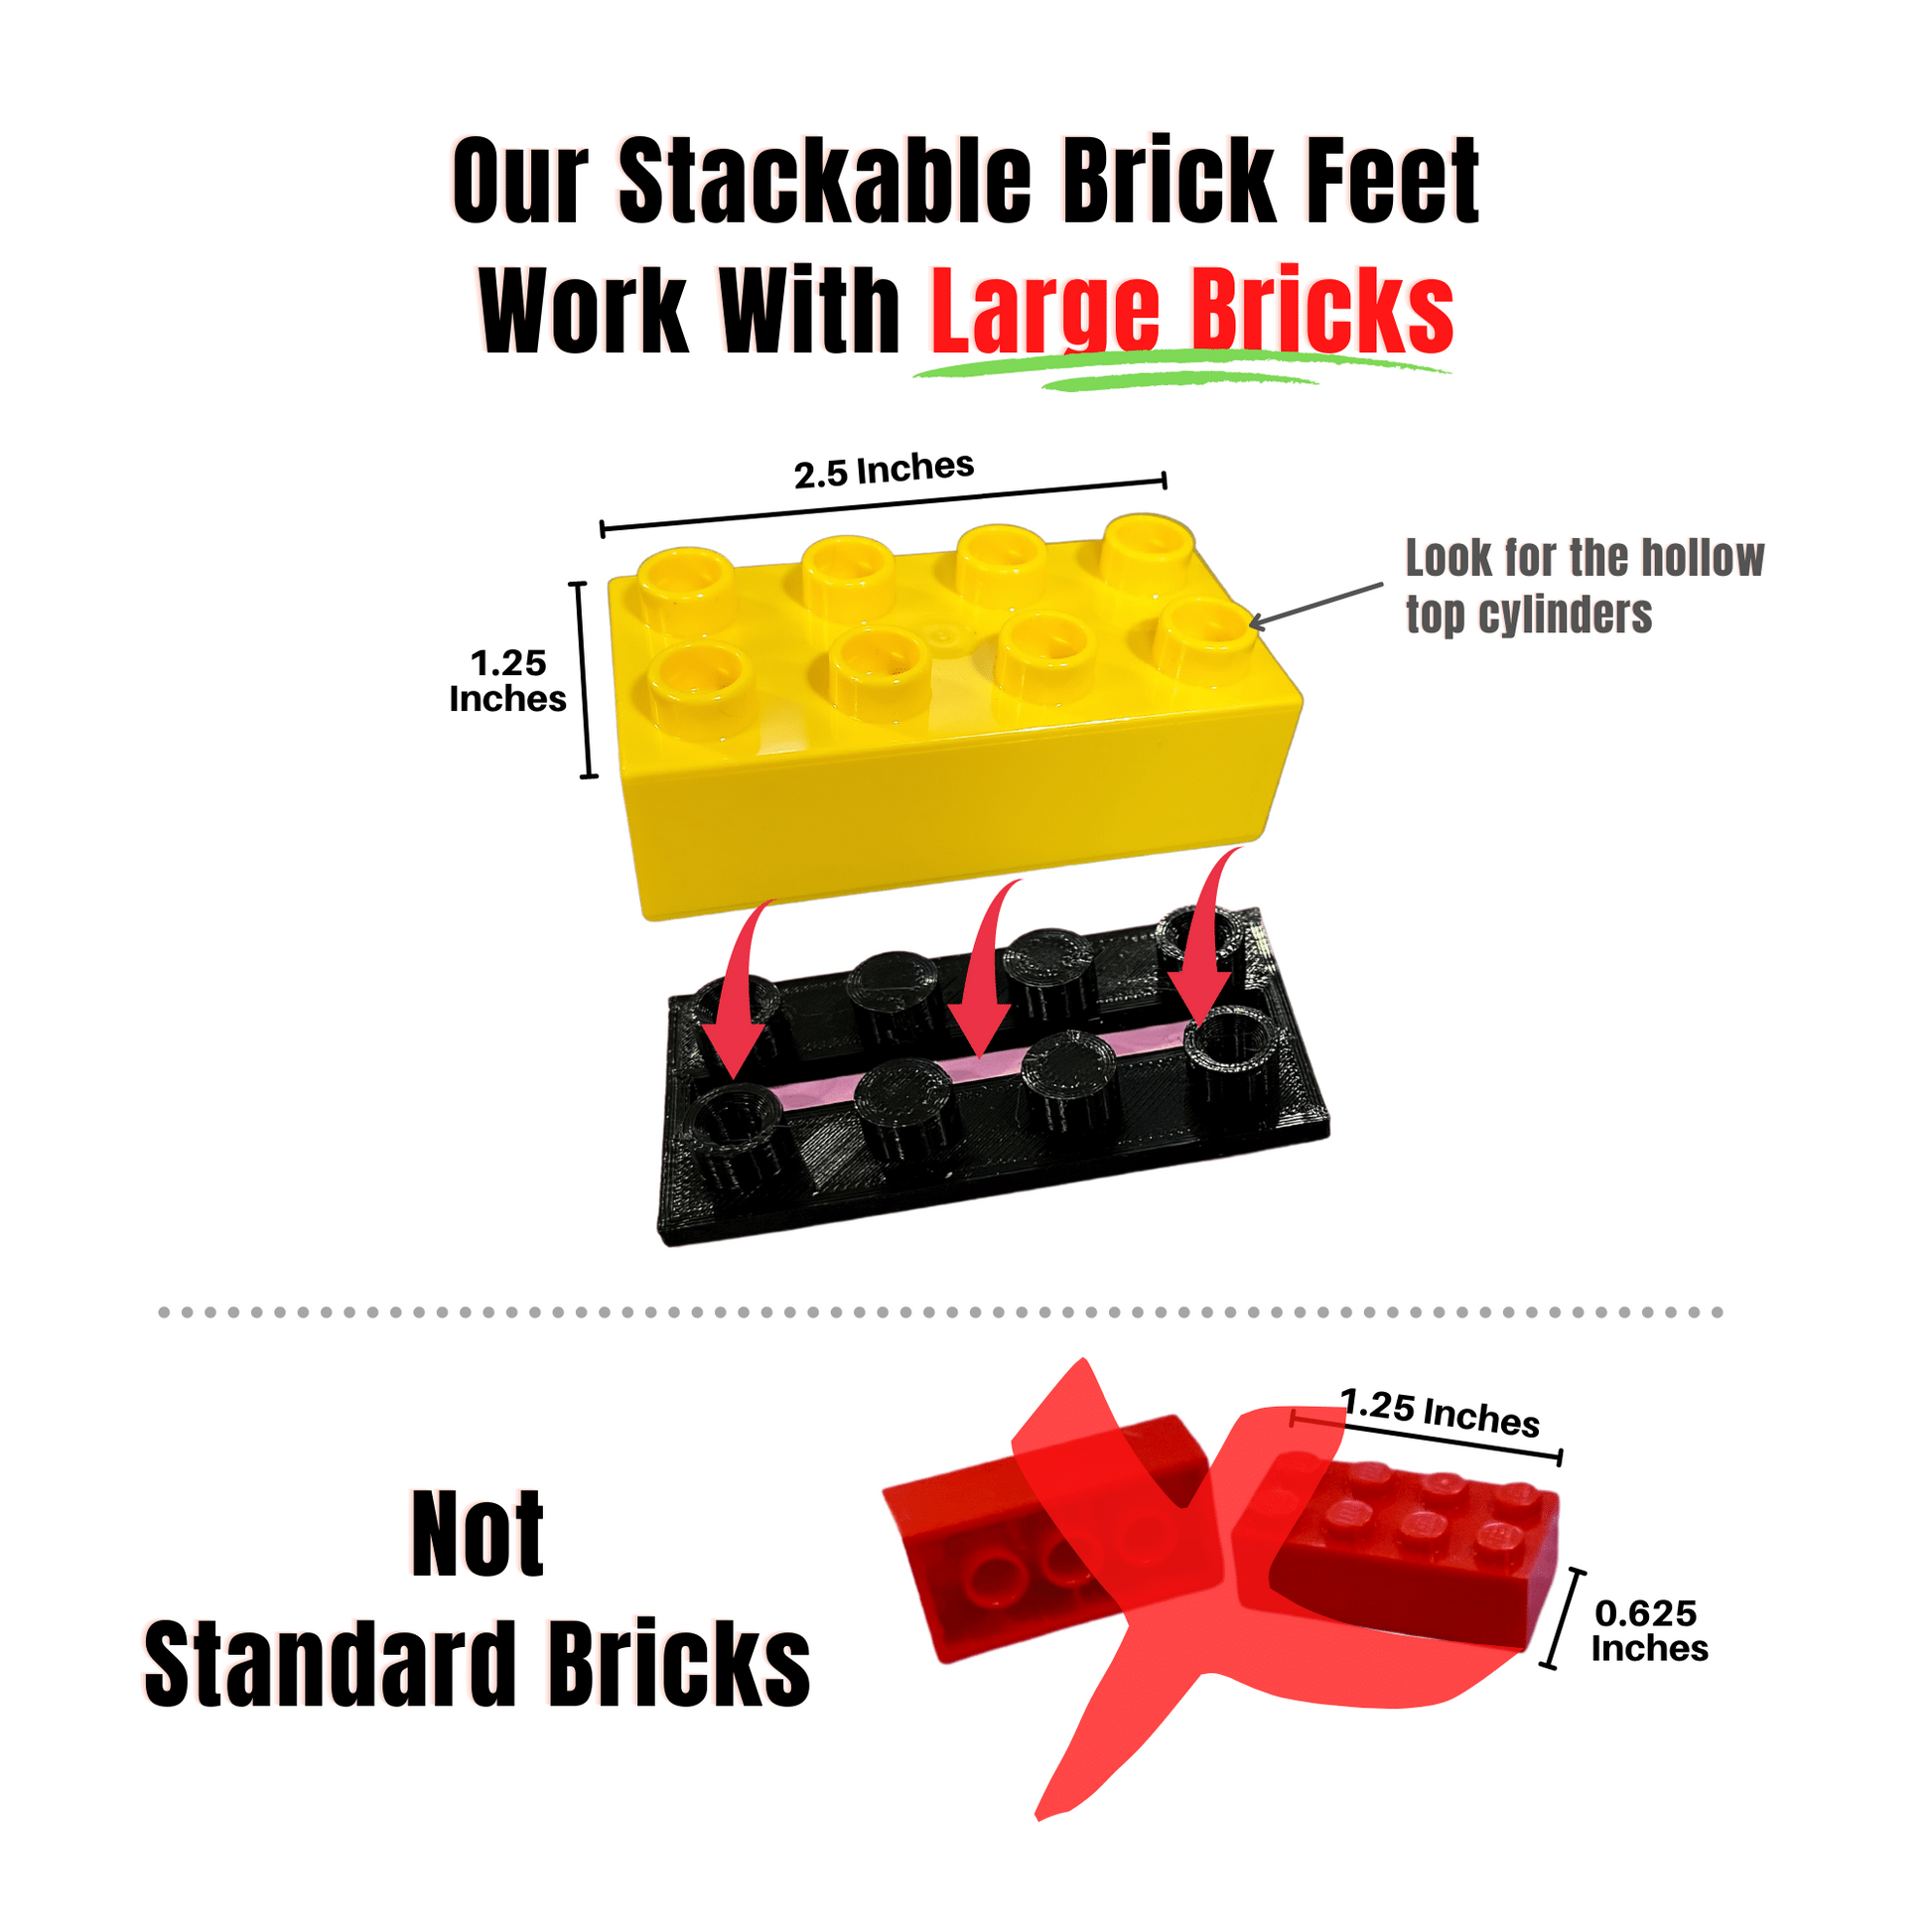
Stackable "Brick" Feet
Secure your Neje laser engraver's feet while easily raising and lowering the height of your entire laser. With our stackable "brick" feet, just add or subtract blocks to change your laser's height as needed. Super simple to use and compatible with the common stackable 2x4 bricks that your child has lying around their room. Please refer to image about brick sizing.
Watch the video here (the video is for an Ortur laser but shows the overall install and utility of all of our Brick Feet in general).
Uses 2x4 blocks (Bricks not included) These work with the large style bricks.
Set of 4 feet
Screw bottom plates to your table or surface, add blocks/bricks to the top until you reach the desired height. Make sure all four brick stacks are even and place KGD branded top brick on top. Then place your Neje's stock feet into the slits on the top.
The holes on the outside of the feet are 4mm and the 4 inside holes are 3.8mm in diameter and the plate is 3mm high
NOTE - STACKABLE BRICKS NOT INCLUDED - but can be found here
--
Credits and Sources: REMIXED By KGD Z Axis Adjuster Originally from the design (I Have permission and pay royalties) By PLAY3Rone977 Remixed by paulmacdermot The T-Handle wrench is designed by Kezat